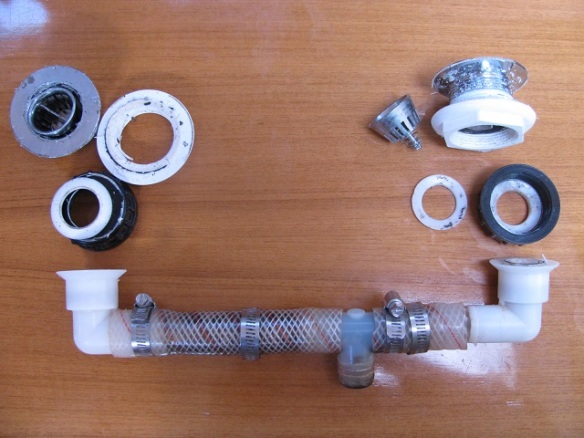
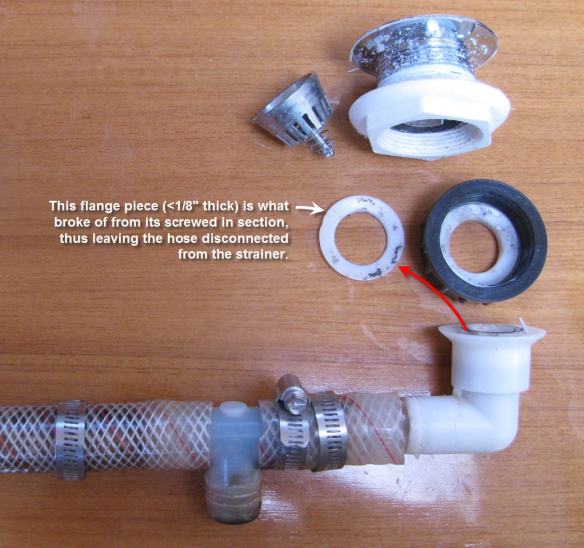
We noticed one evening that there was an amount of water on the galley floor. A quick check and we were not taking on water and the fresh water system was not leaking, so we just assumed that we had been sloppy washing the dishes and wipes things up. But then it happened again. This time a closer inspection showed that we had standing water in the shelf under the sink. I felt the drain hoses and in so doing moved them. I noticed that the drain had separated from the underside of the sink! We were fortunate that it didn’t happen until the last night before we got back to the marina. We only had to do the dishes in a pail for a day or so.
The issue lay in the fact that the drain system was all plastic and of very thin material, and that we had been pushing more and more stuff under the sink, which must have also pressure on the system. Age may have also been a factor (10+ years) since the second drain also just separated from the sink while I was trying to remove the old broken one. Plastic does become more brittle over time. I decided not to replace in kind, but to use standard house plumbing components which have proven themselves from a time perspective. It was also mid-sailing season and I decided that I would keep what looked like an existing 1″ thru-hull fitting and hose. Whatever I connected to the existing hose, I wanted to keep that connection above the static water-line (for piece of mind). This way if a connection failed while the sea-cock was open, the boat wouldn’t fill with water.
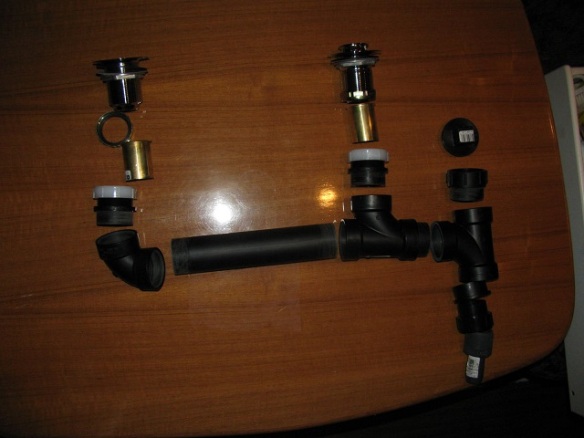
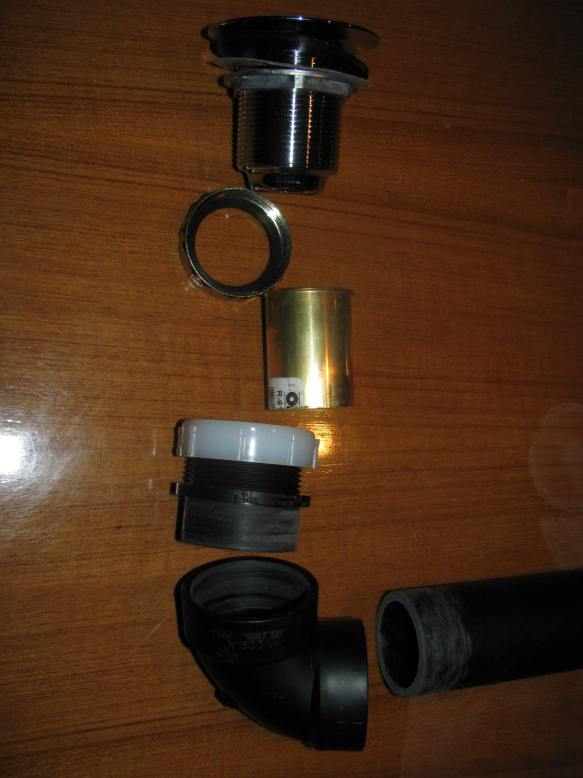
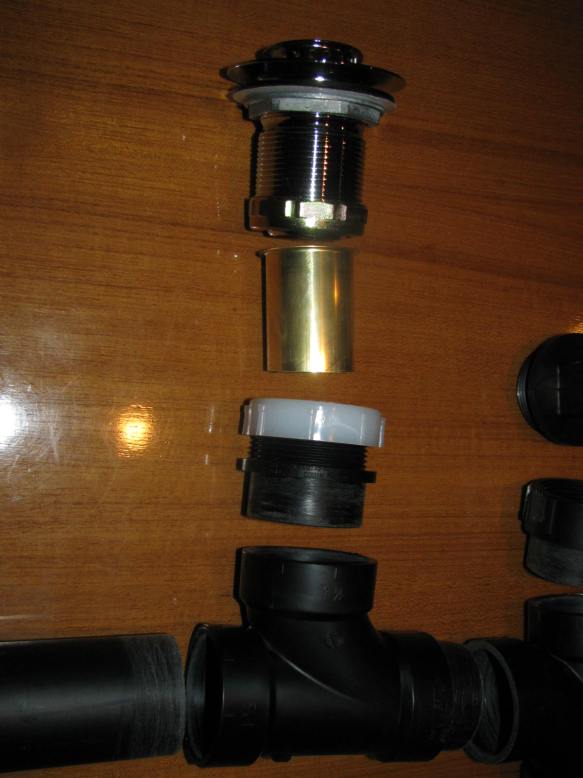
I was looking for some stainless steel bar sink strainers to replace the old plastic ones from Catalina, but after much searching I settled on a stainless steel Duplex Strainer with Basket from Moen. It has a 2-1/2″ diameter flange and just fit the sink. I next connected a copper tailpipe to it so that I could then go into 1-1/2″ ABS for the main section of the drain. None of the plastic tails fit the strainer and I wanted to avoid plastic this time around. The shortest tail piece was 4″ long, so I cut it to 2″, which was all that I needed and it helped keep the system closer to the underside of the sink.
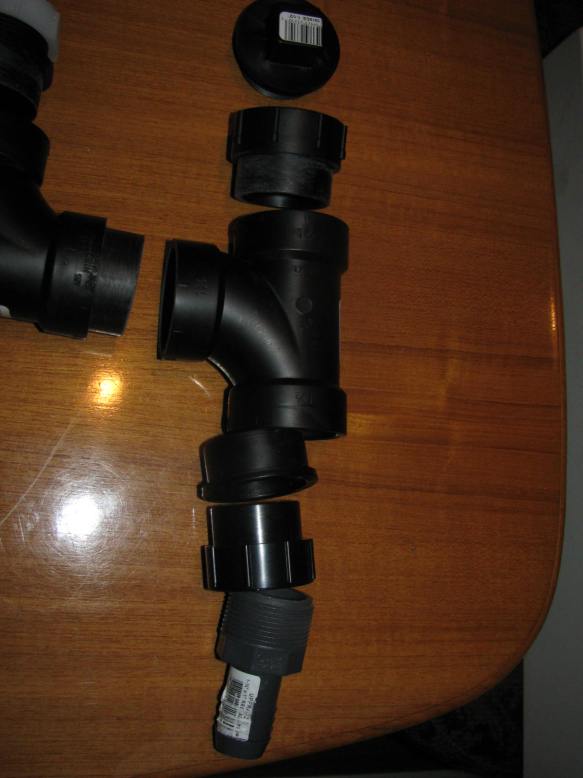
Instead of teeing down from in between the two basins like Catalina did, I had the drain drop at the starboard end so it went down closer to where the thru-hull is. Since I was going from 1-1/2″ ABS pipe into a 1″ hose to the thru-hull I had some concern that I could develop a clog at this point of reduction. So I added a clean out a this down elbow. The final piece that transitions to the barbed fitting to the hose only came in 1-1/4″ so I had to use a reduction ring. That fitting also did not come in ABS and I believe it was a PVC reducing male adaptor.
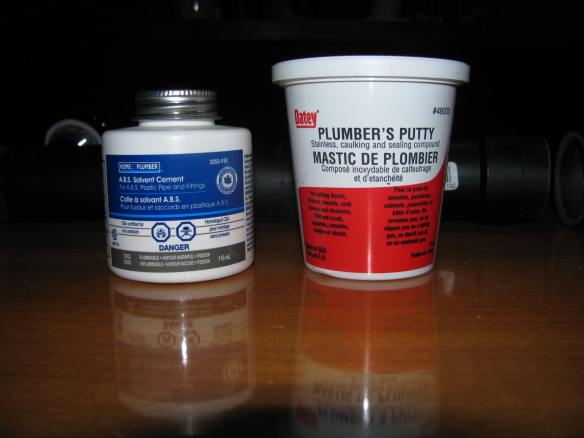
If you are doing the same thing, make sure that you get the correct cement for connecting your ABS pipes (A.B.S. Solvent Cement) and Plumber’s Putty for sealing between you stainless sink and the stainless strainer. For the strainer, just roll out the putty (like play-dough) and lay it in around the collar of the strainer near the threads. Be generous, you will clean up any that squeezes out after you tighten the strainer to the sink. Make sure this is nice and tight.
Next I measured and cut the pipes and dry fit all the fittings. Once I was convinced that I had everything correctly fitting, I sanded all the contact points that would get cemented (both surfaces). I then cemented the three vertical sections together and did the final cementing of the horizontal pipes last. That was because I wanted to get he angles of the drains and clean-out just right. If you make a mistake, you’re back at the store buying more pieces (the cement sets fast).
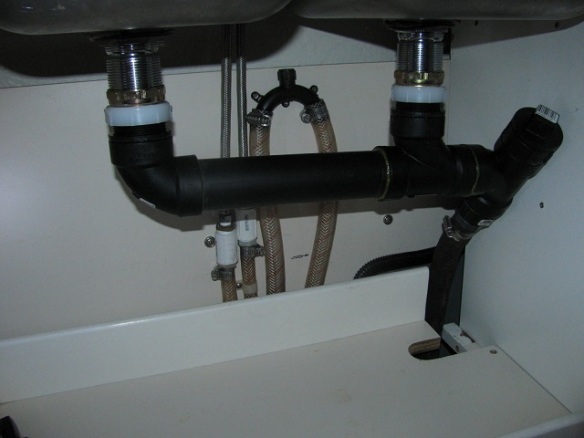
I did have to cut the existing hose by 3″ or so. So the new drains are lower than the original system. However the down drain to the thru-hull is more out of the way now. I did manage to keep the lowest connection above the static water-line as well. The last photo shows the water-line as the horizontal mark between the shower/ice-box drain loop.
So far the sink is draining well, and all connections are fast and dry, and no water on the shelf or galley floor. Time will tell if this system will last as long as the previous one.

